Digital Ocean
Managed Databases
Creation
To create a managed database on Digital Ocean, follow these steps:
Log in to your Digital Ocean account.
Navigate to the “Databases” section.
Click on the “Create Database” button.
Choose the database engine (e.g., PostgreSQL, MySQL).
Configure the database settings (e.g., name, size, region).
Click “Create Database” to provision the managed database.
Connection to your laptop
Databases, click on your Postgres database, Settings Add the public IP of your workstation to Trusted sources
Tip
The IP auto-detected by Digital Ocean was not correct (for me). I used https://whatismyipaddress.com/ to find the correct address.
Actions, Connection details, select Public network and then Connection string.
Tip
Make sure you click on the Public network (I forgot)!
Copy the connection string for user doadmin and Database defaultdb.
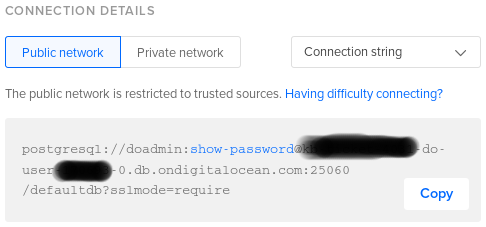
Use the connection string in psql as follows:
psql "postgresql://doadmin:[email protected]:25060/defaultdb?sslmode=require"
Note
You can Download the CA certificate (but we didn’t need to use it).
Create a database for your app
To create a database for your app…
Create the User in the Digital Ocean Control Panel.
Tip
Add the public IP of your workstation to Trusted sources (see above)
Select Public network, then copy the Connection string for
user doadmin and Database defaultdb:
psql "connection_string"
ALTER ROLE your_user WITH CREATEDB NOCREATEROLE LOGIN;
\q
Select Public network, then copy the Connection string for
your user and the defaultdb Database:
psql "connection_string_for_your_user"
CREATE DATABASE your_database TEMPLATE=template0 ENCODING='utf-8';
Restore
Restore from project and upload to migrate to digitalocean:
# Restore the database from project directory
kb.py --restore
Select Public network, then copy the Connection string for your role name and your database, then upload and restore to your database:
psql -X --set ON_ERROR_STOP-on -d "connection_string" --file /path/to/your_dump_file.sql
Data Center Locations

Project
One of our servers was in the wrong project. We could not see a way to remove it, so created another project added it to the new project.
Note
The Digital Ocean API does not include the project name in the
droplets API call, so we use the tags to identify the
owner of the droplet.
PTR
email conversation with support@digitalocean.com ref an unknown ticket
I understand that the PTR records are not published for host IP 178.62.14.86.
We automatically create PTR records for Droplets based on the name you give that Droplet in the control panel. The name must be a valid FQDN, so using
example.comit as the Droplet name will create a PTR record, butubuntu-s-4vcpu-8gb-fra1-01ormy-dropletwill not.Droplets with IPv6 enabled will only have PTR records enabled for the first IPv6 address assigned to it, not to all 16 addresses available.
Please rename the Droplet
kb-vpntovpn.kb.comand our systems will automatically create a PTR record.Once done check the status of the DNS propagation here for the PTR record here, https://www.whatsmydns.net/
Tip
Don’t forget to select PTR in the dropdown on the whatsmydns.net
page.
I appreciate you for following up with us.
I understand your concerns here. Please note that we automatically configure the reverse DNS entry (PTR record) on our end, based on the hostname of your droplet. Currently, we do not offer direct access for users to modify PTR records via DNS. This is the only method available at present to create a PTR record on our platform.
doctl
Install doctl (see How to Install and Configure doctl)
and copy to your bin folder:
mv ./doctl ~/bin/
Create a token, API, Applications & API, Tokens, Generate New Token.
Tip
I don’t know which Scopes to select. Full Access works (but I don’t like to use it). Could try Read Access, registry and Update Access, registry.
Authorise the token (context):
doctl auth init --context kb-software

# check your context is 'current'
doctl auth list
doctl auth switch --context kb-software

# I think you may need to remove the old context before 'init' a new one!
doctl auth remove --context kb-software
Console
From Access a Component’s Console Using the CLI …
Click on your app to find the URL (in the browser address bar) e.g. https://cloud.digitalocean.com/apps/8e6ecaed-70bf-475d-8998-93384c705b90
Activate a console for UUID in the URL and the component:
doctl apps console "8e6ecaed-123abc" "kb-kbsoftware-couk-dramatiq"
Container Registry
To switch to a different registry, use the doctl auth switch command:
doctl registry login

# then 'docker push'...
Jobs
To run Django management commands e.g. django-admin mail-send:
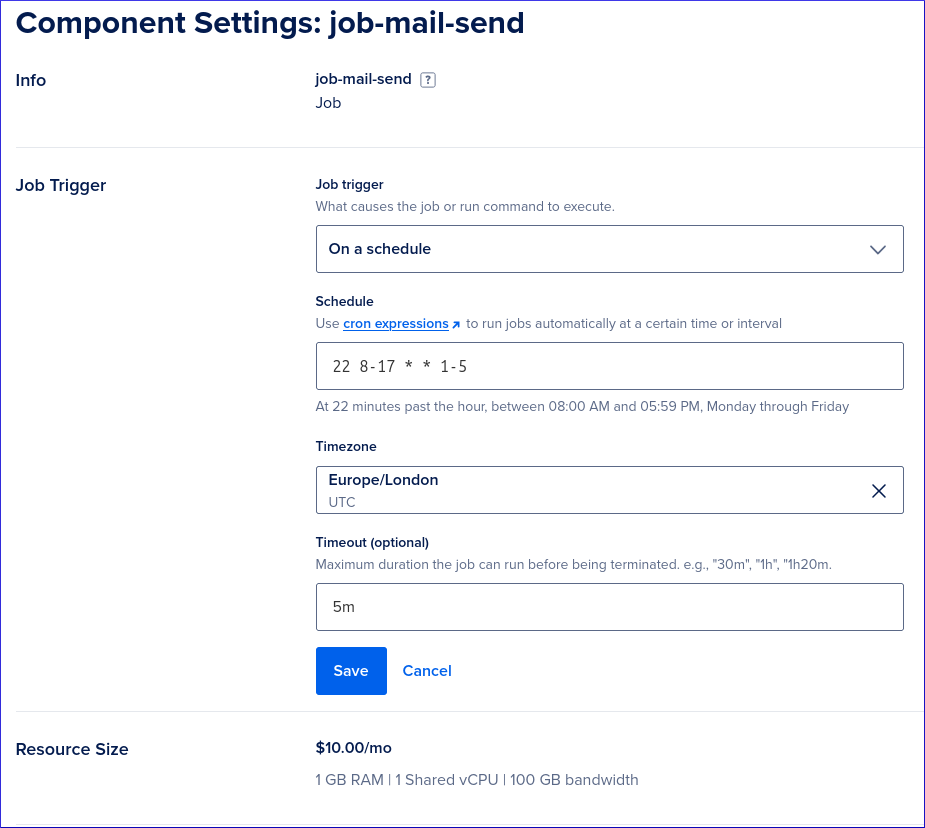
The name of the component should be
job-followed by the name of the management command.I am using the schedule,
22 8-17 * * 1-5which runs the command At 22 minutes past the hour, between 08:00 AM and 05:59 PM, Monday through Friday.Set the Timeout to 5 minutes (unless the command needs longer to run).
The Run Command is the
django-admincommand e.g.django-admin mail-send..
To check the logs, click on Activity, Jobs …
Tip
Don’t forget to add an alert, Settings, Alert Policies, add an email notification for a Failed Job Invocation.
Spec
From How to Update an App’s Spec …:
doctl apps spec get "8e6ecaed-123abc" > spec.yaml
Tried an update with a new spec file, but I had to remove the
ingress section to get it deployed:
doctl apps update "8e6ecaed-123abc" --spec spec.yaml
VPC
From How to Enable App Platform VPC …
To add the app to a VPC, find the id of the VPC:
doctl vpcs list
Add the id of the VPC to the spec.yaml at the same level as workers e.g:
workers:
  ...
vpc:
  id: 1ce4ef41-123abc
Tip
See the Reference for App Specification
Spaces
Backup and Sync
Check
The is_aws method checks the AWS_S3_ACCESS_KEY_ID setting:
from base.storage import is_aws

if is_aws():
    # do something...
    pass
Create
Add the region and endpoint URL to your spec.yaml file:
- key: AWS_DEFAULT_REGION
  scope: RUN_AND_BUILD_TIME
  value: lon1
- key: AWS_S3_ENDPOINT_URL
  scope: RUN_AND_BUILD_TIME
  value: https://lon1.digitaloceanspaces.com
Create a Bucket
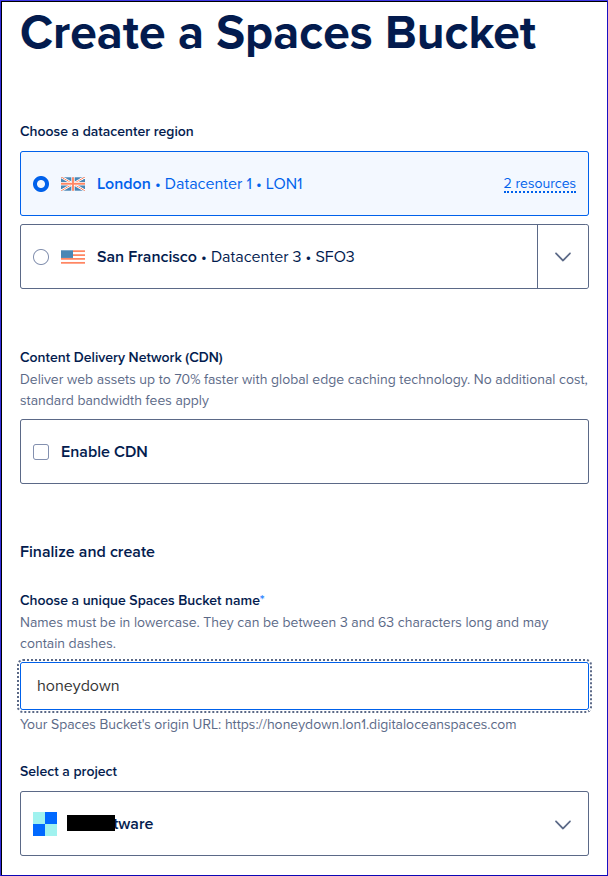
Add the bucket name to your spec.yaml file:
- key: AWS_STORAGE_BUCKET_NAME
  scope: RUN_AND_BUILD_TIME
  value: hatherleigh
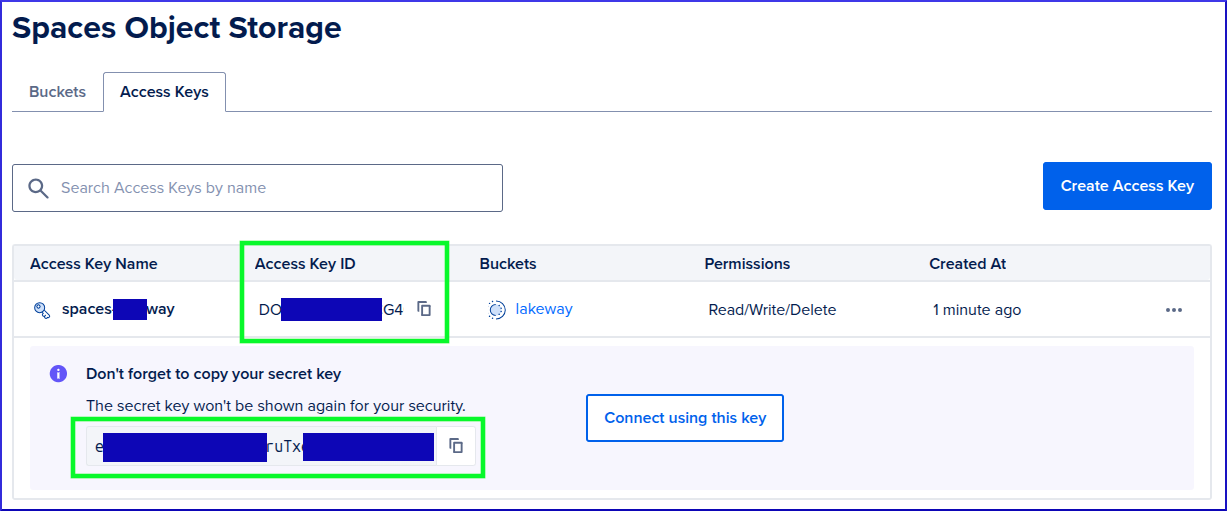
Select your Bucket, then create a Limited Access Key with Read/Write/Delete Permissions
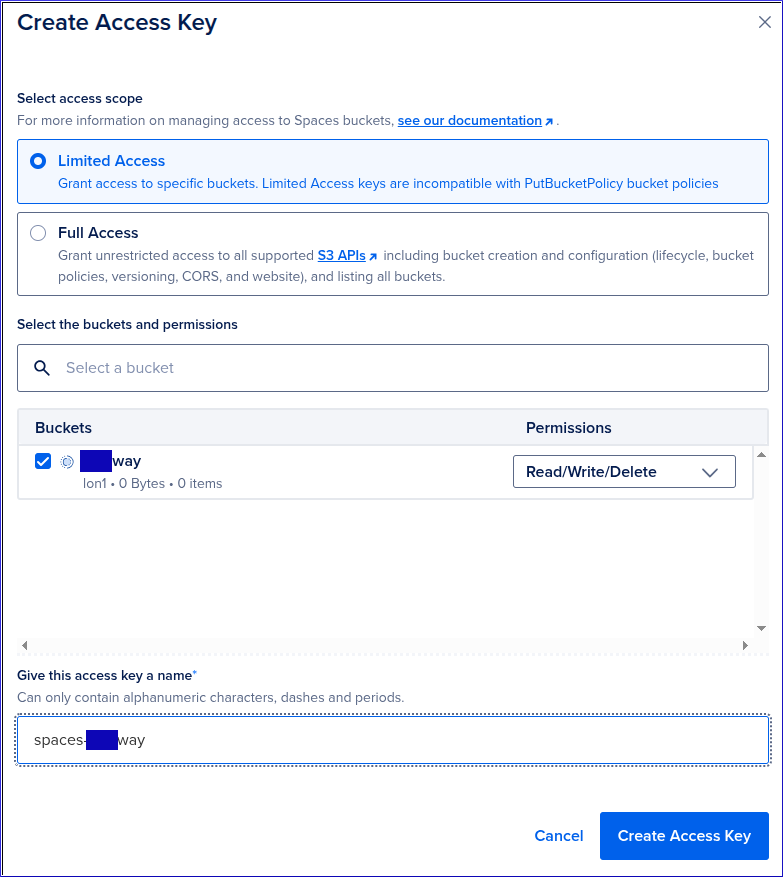
Copy the Access Key ID and secret key to your spec.yaml file:
- key: AWS_S3_ACCESS_KEY_ID
  scope: RUN_AND_BUILD_TIME
  value: DO123123123123G4
- key: AWS_S3_SECRET_ACCESS_KEY
  scope: RUN_AND_BUILD_TIME
  value: eabc123456789rutx123456789
CORS Configurations
Tip
When entering the Origin, do NOT enter a trailing slash (e.g. https://www.kbsoftware.co.uk will work, but https://www.kbsoftware.co.uk/ will not).
Browse to the Settings page of your Space using the Control Panel.
In the CORS Configurations section, click Add.
Under Origin, enter the exact origin domain (including
http://orhttps://). A wildcard origin is insecure.Under Allowed Methods, select GET
Click on Add Header, and in text box that appears, enter:
Access-Control-Allow-Origin
Set Access Control Max Age to
600so that the header we just created expires every 10 minutes.
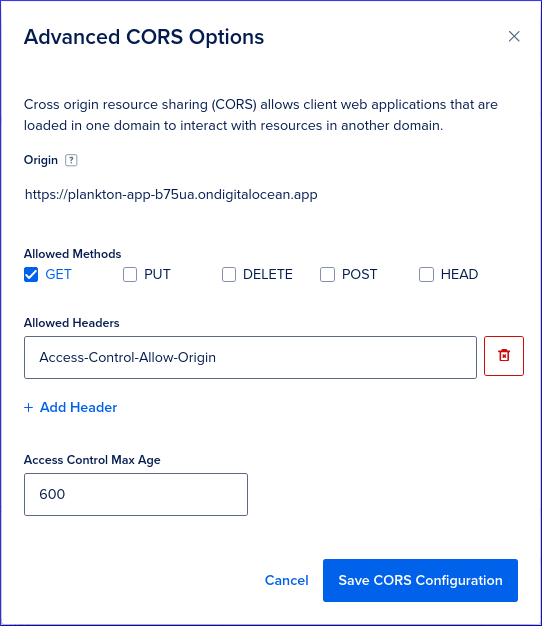
For more information, Set Up a Django App with DigitalOcean Spaces - Configuring CORS Headers
Transfer
From Setting Up s3cmd 2.x with DigitalOcean Spaces…
Create a new Spaces key with access to All buckets.
Configure s3cmd on the server:
sudo apt install s3cmd
sudo -i -u web
s3cmd --configure
# Copy the 'AWS_ACCESS_KEY_ID' and 'AWS_SECRET_ACCESS_KEY' from an 'All buckets' key
Access Key
Secret Key
Default Region [US]:
> Press enter (to ignore)
# S3 Endpoint:
lon1.digitaloceanspaces.com
# DNS-style bucket...:
%(bucket)s.lon1.digitaloceanspaces.com
Encryption password:
> Press enter (to ignore)
Path to GPG program
> Press enter (to ignore)
Use HTTPS protocol [Yes]
> Press enter (to accept)
HTTP Proxy server name:
> Press enter (to ignore)
Save settings? [y/N] y
> Press y to accept if the test was successful
Copy the files to the Spaces bucket:
sudo -i -u web
cd /home/web/repo/files/www.hatherleigh.info/private
s3cmd put * s3://www-hatherleigh-info/private/ --recursive

cd /home/web/repo/files/www.hatherleigh.info/public
s3cmd put * s3://hatherleigh/media/ --recursive
Update the file permissions in the media folder to public:
s3cmd setacl s3://hatherleigh/media/ --recursive --acl-public