Create SSL Certificate
Important
These instructions related to manually obtained SSL certificates. To use lets encrypt certificates see Obtain and configure ssl certificate on nginx with letsencrypt
To install an SSL certificate, see Install SSL Certificate…
Note
To validate the domain name, you will need to receive an email. If you are not using Google Mail, then set-up MailGun by following the instructions in Mailgun
We use two companies for SSL certificates, SSLs.com and StartSSL. The certificates from StartSSL are free, but the web site is complicated to use.
Create a domain folder within the ssl-cert folder e.g. Site - Configuration.
Run the following commands in that folder.
SSLs.com
Warning
When using ssls.com the Common Name must include the
www
i.e. www.hatherleigh.info rather than hatherleigh.info.
Generate your certificate request and private key:
openssl req -new -newkey rsa:2048 -nodes -keyout server.key -out server.csr

Generating a 2048 bit RSA private key
..................+++
.........................................+++
writing new private key to 'server.key'
-----
You are about to be asked to enter information that will be incorporated
into your certificate request.
What you are about to enter is what is called a Distinguished Name or a DN.
There are quite a few fields but you can leave some blank
For some fields there will be a default value,
If you enter '.', the field will be left blank.
-----
Country Name (2 letter code) [AU]:GB
State or Province Name (full name) [Some-State]:Devon
Locality Name (eg, city) []:Okehampton
Organization Name (eg, company) [Internet Widgits Pty Ltd]:www.hatherleigh.info
Organizational Unit Name (eg, section) []:
Common Name (e.g. server FQDN or YOUR name) []:www.hatherleigh.info
Email Address []:

Please enter the following 'extra' attributes
to be sent with your certificate request
A challenge password []:
An optional company name []:
Note
Country code for the UK is GB
Note
Do not enter the email address, challenge password or optional company name). Just press Enter to ignore.
This process will generate two files, server.csr (the certificate request)
and server.key (the private key).
Use the certificate request (server.csr) file to request a certificate from
https://www.ssls.com/
Confirm Domain ownership by receiving an email - choose webmaster@hatherleigh.info
When the certificate is approved, you will be sent an email containing a couple of certificates.
Copy the Web Server CERTIFICATE into a file called ssl.crt. The
certificate is the text starting with -----BEGIN CERTIFICATE----- and
ending with -----END CERTIFICATE-----.
Copy the INTERMEDIATE CA into a file called intermediate.crt. The
certificate is the text starting with -----BEGIN CERTIFICATE----- and
ending with -----END CERTIFICATE-----.
Concatenate the two certificates to create a unified certificate:
cat ssl.crt intermediate.crt > ssl-unified.crt
StartSSL
Note
Instructions for http://www.ssls.com/ are similar. See the section above for instructions on generating a certificate request.
Using https://www.startssl.com/, enter the Validations Wizard and choose Domain Validation, enter the Domain Name, select a Verification Email and then enter the verification code sent to the selected email address.
Enter the Certificates Wizard, select Web Server SSL/TLS Certificate, then click Continue.
Add both the example.net and www.example.net into the top box:
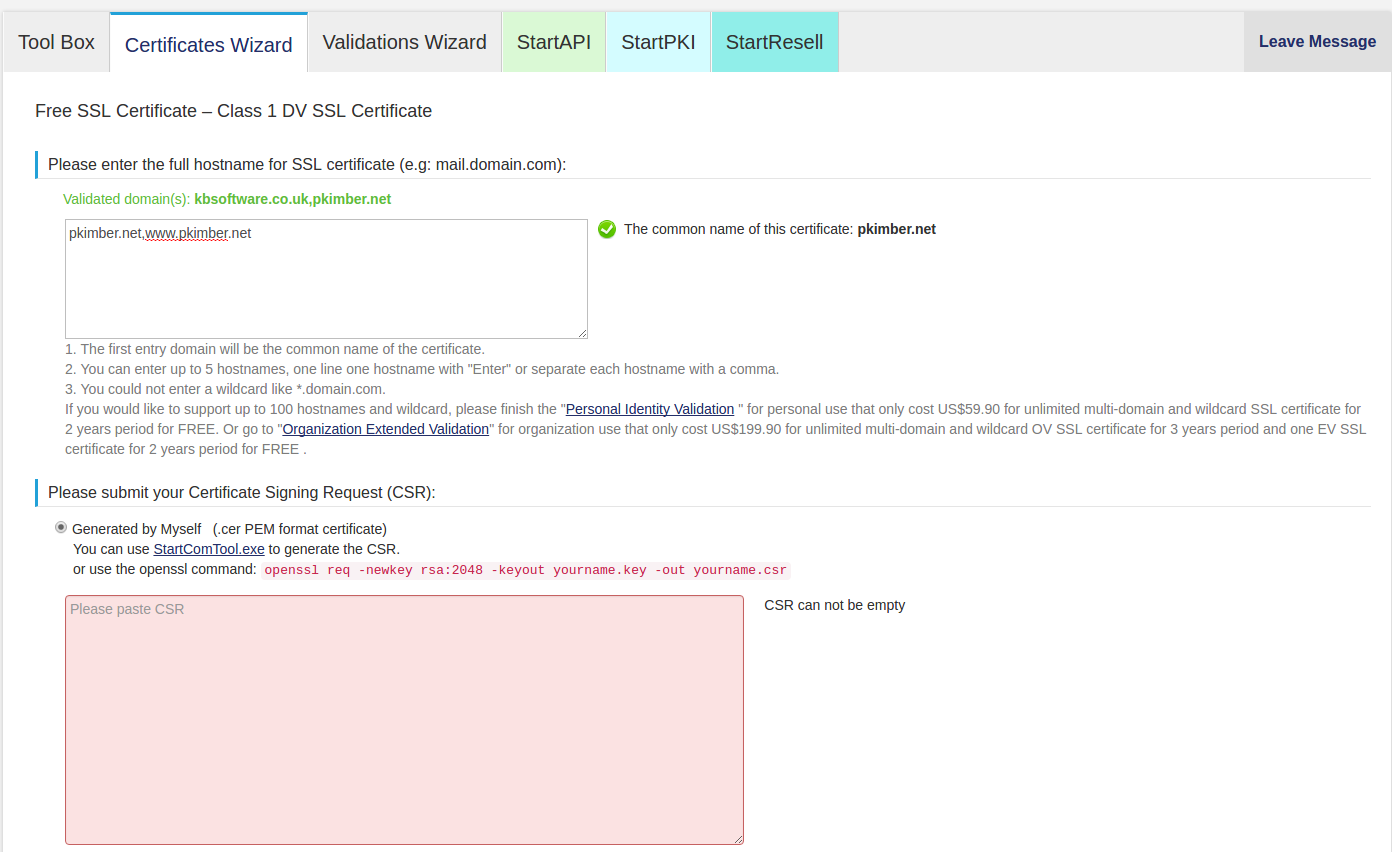
Paste the contents of server.csr into the bottom box. The request is the
whole file starting with -----BEGIN CERTIFICATE REQUEST----- and ending with
-----END CERTIFICATE REQUEST-----.
Click Submit, then Certificate List, then click Retrieve for the appropriate common name (example.net).
Extract NginxServer.zip from the downloaded file into the ssl-cert folder.
Extract 1_example.net_bundle.crt from the NginxServer.zip and rename it
ssl-unified.crt
Install
To copy the certificate to the server, refer to the Install SSL Certificate notes…
Verify
To make sure your certificate matches the private key:
openssl x509 -noout -modulus -in ssl.crt
openssl req -noout -modulus -in server.csr
openssl rsa -noout -modulus -in server.key
Issues
The nginx log showed:
Starting nginx:
nginx: [emerg] SSL_CTX_use_certificate_chain_file("/srv/ssl/www.hatherleigh.info/ssl-unified.crt")
failed (SSL: error:0906D066:PEM
routines:PEM_read_bio:bad end line error:140DC009:SSL
routines:SSL_CTX_use_certificate_chain_file:PEM lib)
nginx: configuration file /etc/nginx/nginx.conf test failed
This was an issue with the line breaks in the concatenated files.
They looked thus:
-----END CERTIFICATE----------BEGIN CERTIFICATE-----
and it should have looked like this:
-----END CERTIFICATE-----
-----BEGIN CERTIFICATE-----
To acheieve this we added a blank line to the ssl.crt file, re-concatenated,
used fab domain:www.hatherleigh.info ssl to place the new file on the server and
then re-started nginx with service nginx restart on the server as root.
For further help solving this issue, see Fixing PEM routines:PEM_read_bio:bad end line error.